

Your Front Door Deserves Better Than Foggy, Drafty Glass
Front door glass insert replacement is one of the fastest and most affordable ways to refresh your entryway — without buying a whole new door.
Here’s what you need to know upfront:
- You don’t need a new door. A glass insert can be swapped into your existing steel or fiberglass door.
- Cost is much lower. Inserts typically range from around $55 to $1,000, versus thousands for a full door replacement.
- Installation is fast. Most replacements take anywhere from 15 minutes to a few hours, depending on the insert size and whether you DIY or hire a pro.
- Solid wood or fiberglass doors work best. Your door must be at least 1¾ inches thick. Hollow-core doors won’t support the weight.
- Glass types matter. Clear, frosted, decorative, Low-E, and impact-resistant options are all available — each with different benefits for light, privacy, and energy efficiency.
Whether your current glass is fogged, cracked, or just plain outdated, replacing the insert is a smart move — especially if you’re trying to cut energy costs and boost curb appeal at the same time.
In this guide, we’ll walk you through the best glass insert options, how to measure correctly, and exactly how to get it done.
What is a Front Door Glass Insert and Why Replace It?
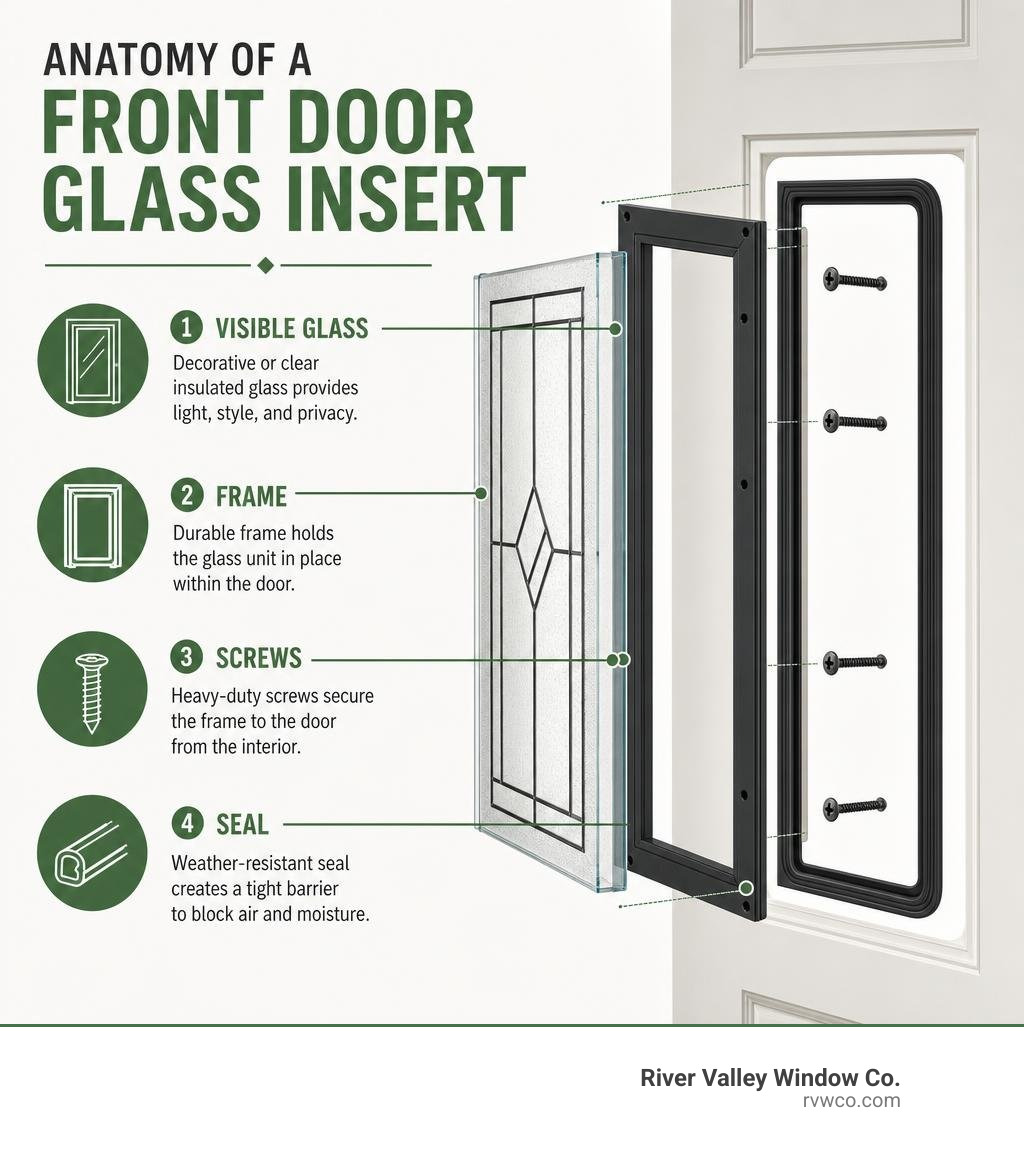
A front door glass insert is a pre-assembled, sealed insulated glass unit (IGU) that sits inside a dedicated frame. This frame is held together by heavy-duty screws on the interior side of your door, creating a secure, weather-tight seal. This smart design means you don’t have to tear out your entire door frame or buy an expensive new slab just to get a fresh look.
For homeowners here in Northwestern Arizona, the intense desert sun and summer heat can take a heavy toll on entry doors. Over time, you might notice several common issues that signal it is time for a front door glass insert replacement:
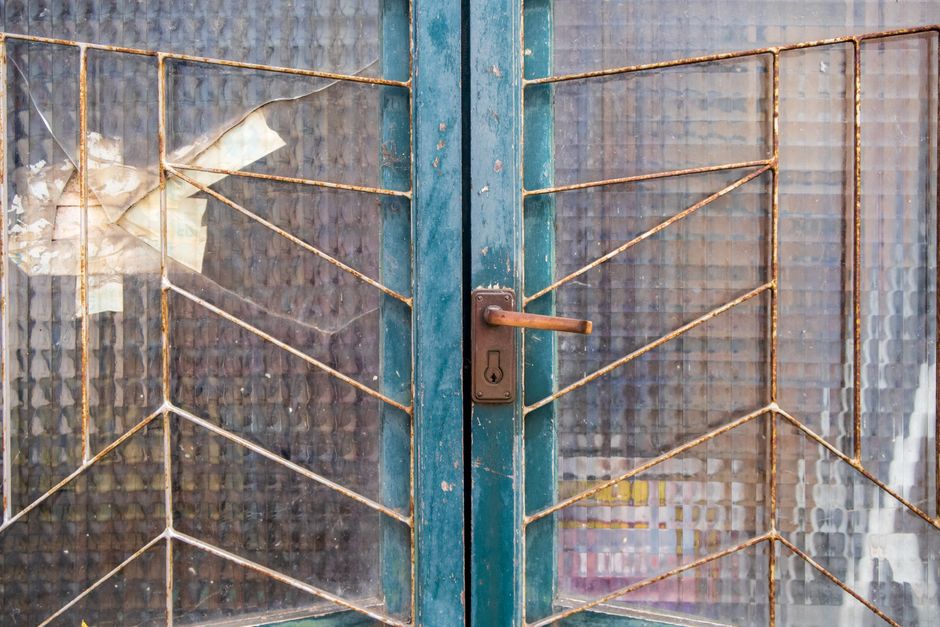
- Failed Seals and Foggy Glass: When the thermal seal between double-pane glass breaks, moisture creeps in, leaving a permanent, cloudy condensation layer that ruins your view.
- Cracked or Damaged Glass: Beyond looking unsightly, any structural compromise to the glass makes your home vulnerable to intruders and extreme weather.
- Yellowed or Warped Frames: Older plastic frames can degrade and discolor under the harsh Arizona UV rays, dragging down your home’s exterior aesthetic.
- Drafts and Energy Loss: If you feel heat radiating through the glass during a 115°F July day in Lake Havasu City, your old glass is actively driving up your air conditioning bills.
Upgrading your glass insert is more than a quick repair; it is a high-impact home improvement project. As we outline in our article on Why Your Front Door Plays a Bigger Role in Curb Appeal Than You Think, your entryway is the focal point of your home’s exterior. Swapping out old, dingy glass for a modern, energy-efficient model instantly elevates your property’s value. Furthermore, learning How Modern Doors Improve Home Security and Comfort highlights how high-quality tempered safety glass and robust frame systems keep your household safe from both unwanted intruders and the relentless desert elements.
Top Types of Front Door Glass Inserts
Choosing the right glass style is all about balancing natural light, privacy, and security. Because a front door is highly visible from the street, you want to pick a material that suits your lifestyle.

Before diving into specific product lines, let’s look at how the primary types of glass inserts compare:
| Glass Insert Type | Privacy Rating (1-10) | Best For | Key Features |
|---|---|---|---|
| Clear Glass | 1 (Low) | Back patios, side entries, scenic views | Maximum natural light, double-pane insulation |
| Low-E Glass | 1-2 (Low) | Front doors facing direct sunlight | Blocks UV rays, reflects heat, high energy efficiency |
| Decorative / Textured | 5-9 (Medium to High) | Front entryways, urban neighborhoods | Obscures view while letting in light, stylish patterns |
| Impact-Resistant | Varies | Severe weather zones, high-security needs | Laminated safety glass, triple-pane construction, uPVC frames |
Choosing Clear and Low-E Front Door Glass Insert Replacement Kits
If your primary goal is to flood your dark entryway with beautiful Arizona sunshine, clear or Low-E glass is the way to go. Standard clear glass offers completely unobstructed views, making it perfect for back patio doors or side entries.
However, for front doors facing the desert sun, we highly recommend upgrading to Low-E (low-emissivity) glass. Low-E glass features a microscopic, transparent metallic coating that reflects infrared heat while allowing visible light to pass through. This keeps your home significantly cooler in the summer and warmer during chilly winter nights.
For a clean, modern aesthetic, the ODL Clear Door Glass – 24″ x 38″ Flat Profile Frame Kit | Zabitat is an exceptional choice. It features a sleek, low-profile frame that sits flat against the door, eliminating the bulky, dated look of traditional raised frames.
If you prefer a classic, architectural look without the maintenance hassle of individual wood panes, the ODL Clear Low-E Door Glass – 4 Light – 7/8 Simulated Divided Light – 24″ x 50″ Frame Kit | Zabitat provides a gorgeous multi-pane appearance. This kit utilizes simulated divided lights (SDL) with external grilles over a highly efficient, double-pane Low-E glass unit, giving you timeless style alongside modern thermal performance.
Upgrading to Decorative or Impact-Resistant Front Door Glass Insert Replacement Options
For those who want to make a bold design statement or require extra privacy, decorative and textured glass inserts are ideal. These units often incorporate frosted, beveled, or water-textured glass arranged in elegant geometric or classic patterns. They let the light shine through while keeping your home’s interior completely private from passersby.
Additionally, homeowners seeking maximum security should look at impact-resistant or hurricane-rated options. These inserts are constructed with laminated safety glass—similar to a car windshield—sandwiched between tempered glass panes. They are designed to withstand high winds, flying debris, and forced entry attempts.
A premier example of this category is the ODL Impact Resistant Renewed Impressions Door Glass – 24″ x 66″ Frame Kit | Zabitat. This high-performance kit boasts a privacy rating of 7 and an impressive Sound Transmission Class (STC) rating of 38, meaning it blocks out street noise just as effectively as it blocks out heat and intruders. To browse a wider variety of styles, patterns, and sizes, you can explore the full collection of Door Glass Inserts – Zabitat to find the perfect fit for your home’s unique architectural character.
How to Measure and Prep for Your Front Door Glass Insert Replacement
The single most important step of a successful front door glass insert replacement happens before you ever pick up a screwdriver: measuring. Ordering the wrong size is a common headache, but it is easily avoided if you know exactly what to measure.
When preparing to order your new insert, follow these four critical steps:
- Measure the Visible Glass Size (VGB): Measure only the glass portion you can actually see, from the inside edge of the frame to the opposite inside edge. This helps identify the standard industry size category you need.
- Measure the Outside Dimensions (O.D.) of the Frame: Measure from the very outer edge of the plastic frame on the exterior of the door. This ensures the new frame will completely cover the existing cutout in your door panel.
- Confirm Door Thickness: Standard residential exterior doors are almost always 1¾ inches (1.75″) thick. Confirm this measurement, as glass inserts are designed specifically to clamp tightly onto this exact thickness.
- Identify Door Material and Panels: Ensure your door is made of solid wood, fiberglass, or steel. If you are cutting a new opening into a solid door, review the Factors to Consider Before Installing New Doors to ensure your door structure can support the weight of the glass.
Step-by-Step DIY Installation Guide
If you are a handy homeowner, replacing a door glass insert is a highly rewarding weekend project. For larger glass units (such as 48-inch or 64-inch lengths), we strongly recommend having a helper assist you, as the glass panels can be heavy and awkward to handle alone.
Tools and Materials Needed:
- Safety glasses and heavy-duty work gloves
- Power screwdriver (or manual Phillips screwdriver)
- Putty knife or painter’s tool
- Painter’s tape
- Drop cloth or cardboard to protect your work surface
- Glass cleaner
Step 1: Prep Your Workspace and Secure the Door
While you can replace smaller inserts while the door is hanging on its hinges, it is much safer and easier to remove the door entirely and lay it flat across two sawhorses covered with a soft blanket or cardboard. This prevents the glass from falling out unexpectedly during removal.
Step 2: Remove the Old Frame and Glass
Locate the plastic screw plugs on the interior frame of your door. Use a dry-wall screw or a small putty knife to pop these plugs out, exposing the installation screws. While your helper supports the glass from underneath, unscrew the interior frame. Once all screws are out, gently pry the old interior frame away. Carefully lift the door panel up to separate it from the exterior frame and glass unit.
Step 3: Clean the Door Cutout
Use your putty knife to scrape away any old caulk, sealant, or dirt from the edges of the door cutout. A clean, smooth surface is essential for ensuring the new factory-applied seal on your replacement insert creates a weather-tight barrier.
Step 4: Position the New Exterior Frame
Lay your new exterior frame (the one without screw holes) flat on your work surface, exterior side facing down. Carefully place the double-pane glass unit into the frame, ensuring the temper stamp on the glass is positioned at the bottom and faces the inside of the home.
Step 5: Lower the Door Panel and Secure
With your helper, carefully lower your door panel over the glass and exterior frame assembly. Once aligned, place the new interior frame (the one with screw holes) into position. Insert the provided screws and tighten them halfway by hand.
Using a screwdriver, tighten the screws in an alternating, cross-diagonal pattern (similar to tightening lug nuts on a car wheel). This ensures even pressure across the seal. Avoid overtightening, as this can strip the plastic threads or crack the frame.
Step 6: Final Touches
Pop the new screw cover plugs into the screw holes for a clean, finished look. Clean your beautiful new glass with standard window cleaner. If you plan to paint or stain the frame to match your door, consult the ODL DIY Installation Guide for specific instructions on using adhesion-promoting primers.
To avoid common pitfalls during this process, make sure to read up on the Common Mistakes Homeowners Make When Choosing a New Door so your installation goes off without a hitch!
Frequently Asked Questions About Door Glass Replacements
How long does a typical glass insert replacement take?
For an experienced DIYer or a professional installer, a standard glass swap takes between 45 minutes to two hours. If you are cutting a brand-new opening into a solid door panel for the first time, expect the project to take three to four hours to complete safely.
How do you maintain and clean a new door glass insert for longevity?
To keep your glass looking pristine, clean it regularly with a mild glass cleaner and a microfiber cloth. Avoid using harsh abrasive cleaners or high-pressure power washers, which can damage the weather-tight seal around the frame. If you live in an area with high dust and wind, regularly wipe down the frame tracks to prevent debris buildup.
Can I install a glass insert in a hollow-core door?
No. Hollow-core doors lack the interior structural framing required to support the substantial weight of a double-pane glass insert. Attempting to cut into a hollow-core door will ruin the door’s integrity. Glass inserts should only be installed in solid wood, insulated steel, or fiberglass Doors.
Conclusion
A front door glass insert replacement is a cost-effective, high-impact project that can completely transform the look, feel, and energy efficiency of your home. By choosing the right glass type and taking precise measurements, you can enjoy a bright, secure, and beautiful entryway for years to come.
While DIY installation is highly achievable, we understand that handling heavy glass panels and ensuring a perfect, weather-tight seal in the hot Arizona climate can be daunting. That is where we come in.
At River Valley Window Co., we specialize in fast, non-invasive window and door installations throughout Lake Havasu City and Northwestern Arizona. As an authorized dealer of premium Milgard products, we provide high-performance, energy-efficient solutions backed by our industry-leading lifetime warranty.
Skip the heavy lifting and let our expert team handle your entryway transformation. Explore our professional window and door services today and schedule your free consultation!